Appearance
Shopify Installation
Follow these steps to install the eContractor plugin on your Shopify site.
Create Your Shop Page
- From your Shopify dashboard, go to Online Store -> Pages.
- Select Add Page in the top right corner.
- Name the page anything you'd like using the Title textarea. Common choices include:
ShopShop FiltersBuy FiltersOrder Air Filters
Add the Plugin to the Page
- Before clicking into the Content textarea, find and select the
codebutton to change the textarea to HTML.
What does the code button look like?
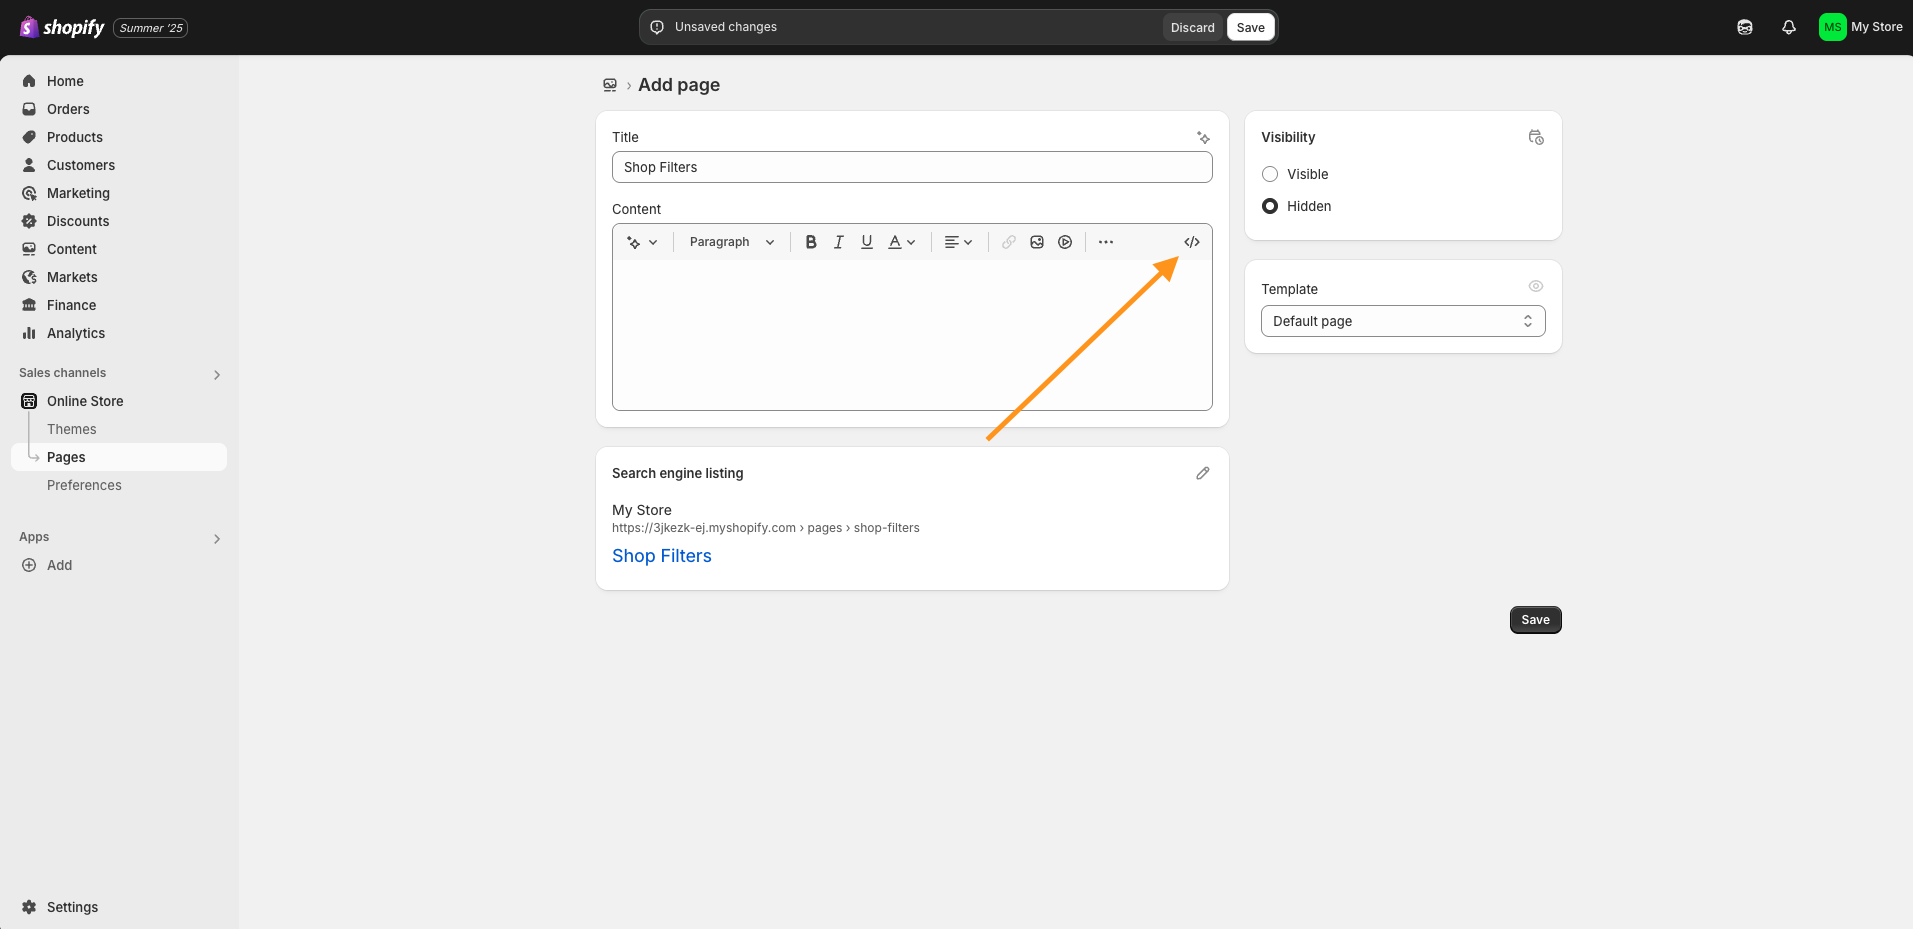
- Paste the following code into the
Contenttextarea:
html
<script src="https://d1vc0si56f5gt.cloudfront.net/ff-plugin.umd.min.js"></script>

<ff-plugin />- Change the pages Visibility from
Hidden->Visible. - Save your changes.
Add the Page to your Site Navigation
- From your Shopify dashboard, select Content -> Menus.
- Select the menu you wish to add the page too. Typically, this is Main Menu.
- Select
Add Menu Item. - For the Label field, our recommendation is to use the same name you gave your page.
Shop,Shop Filtersetc. - For the Link field, select
Pages->Your New Filter Page. - Save your changes.
Final Step: Deploy Your Changes
Once everything is in place, you will see an alert titled Your Almost There! upon previewing your newly created page.
What does the alert look like?
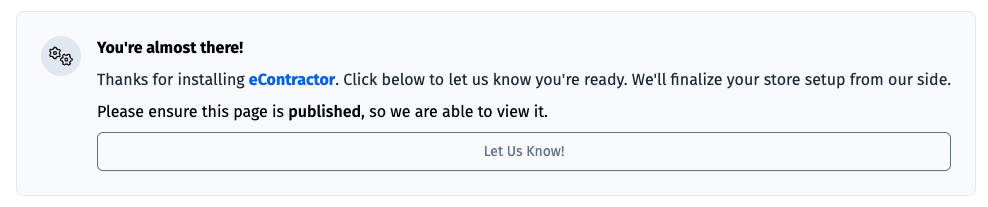
Make sure to publish or update the page so that its live and publicly accessible.
WARNING
⚠️ Please ensure the page is Live before selecting the Let Us Know button, as our team will need to be able to access the page.
Once deployed, go ahead and click on the Let Us Know button. Our team will then get your store live as soon as possible!
TIP
🚀 Once installed and deployed, you’re ready to start driving traffic to your shop page and begin selling!