Appearance
WordPress Installation
Follow these steps to install the eContractor plugin on your WordPress site.
Install a Script Injection Plugin
To add custom scripts to your WordPress site, we recommend using the free WPCode - Insert Headers & Footers.
Add the Script
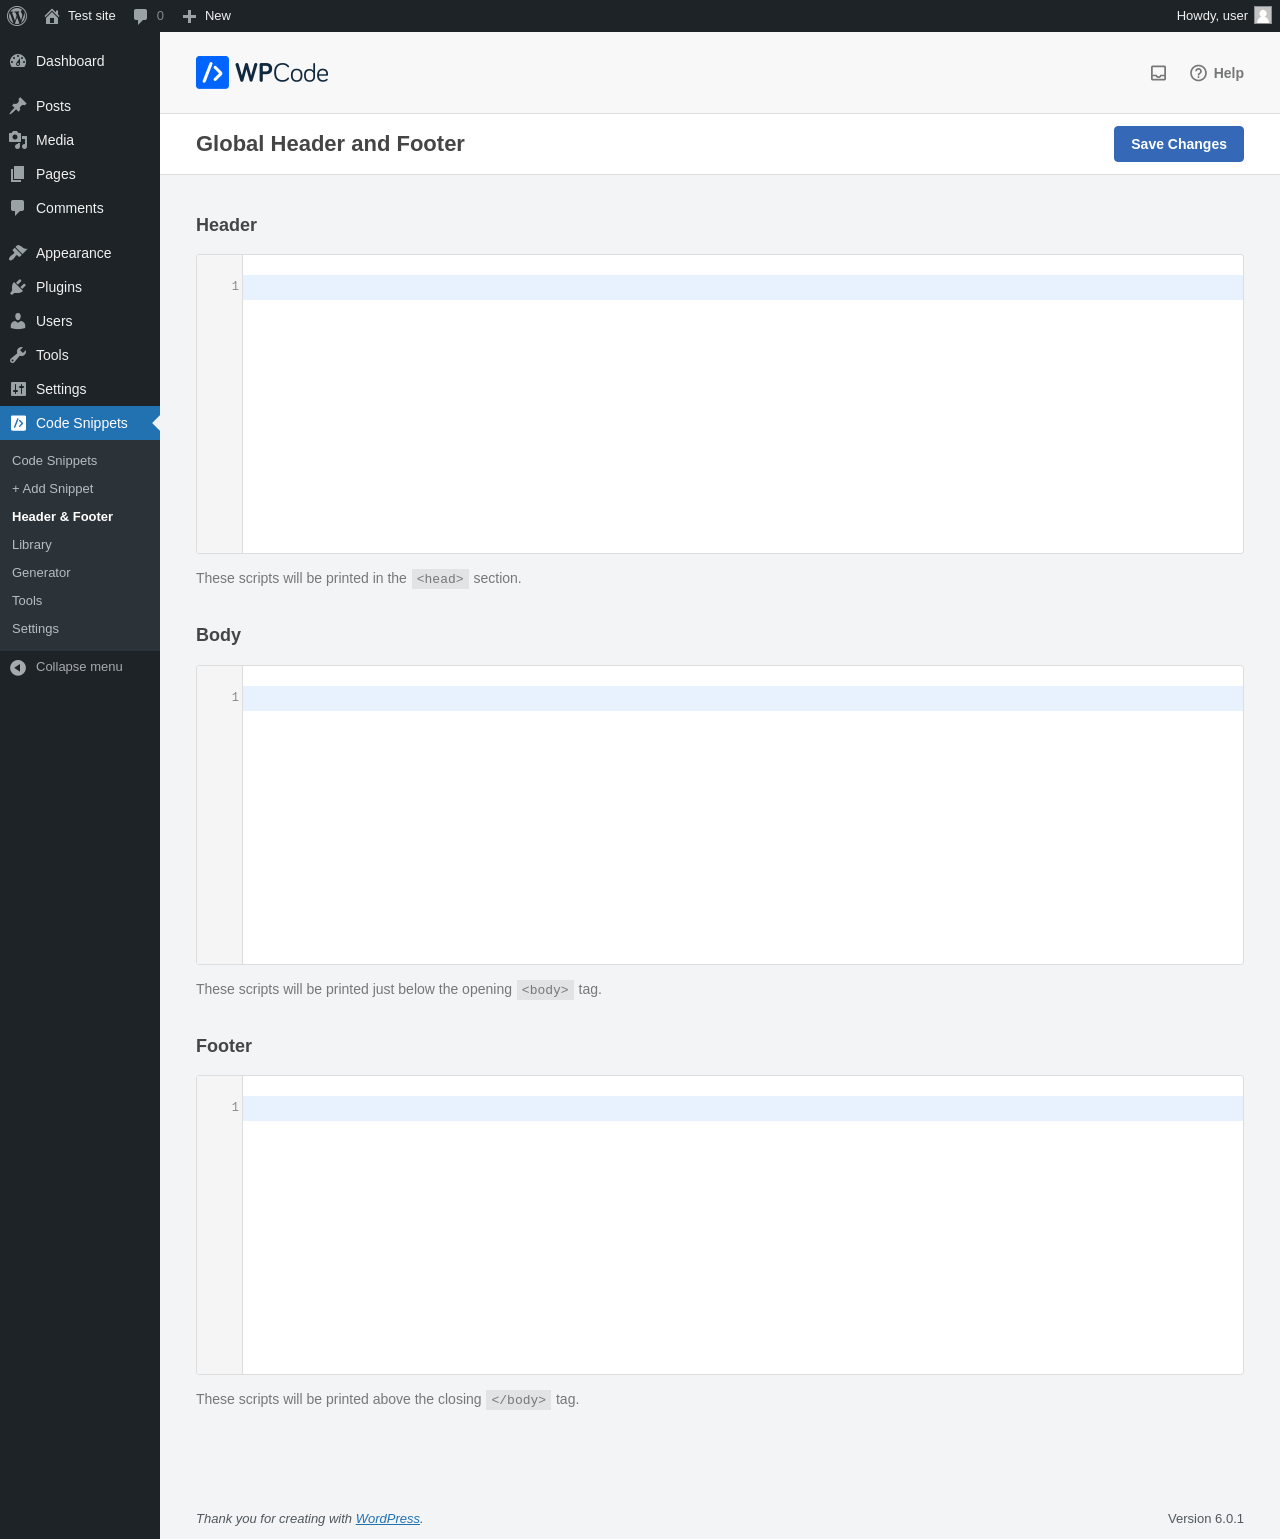
In the lefthand sidebar of your WordPress Dashboard:
- Navigate to
Code Snippets→Header and Footer. - Paste the following script into the
Scripts in Bodysection:
html
<script src="https://d1vc0si56f5gt.cloudfront.net/ff-plugin.umd.min.js"></script>WARNING
⚠️ Do not place the script in the Header section. It needs to be in the Body to ensure correct loading.
What does it look like?
View More Information
By using the Insert Headers and Footers plugin, the script will be added globally — meaning it will load on every page of your site.
If you'd prefer to load the script only on specific pages, feel free to use your own method of script injection. In fact, we encourage it when possible to reduce unnecessary resource loading on pages where the plugin isn’t needed.
Create Your Shop Page
- From your WordPress dashboard, go to Pages -> Add New
- Create a new blank page. Most themes offer a "Full Width" or "Blank Canvas" template - choose one that avoids sidebar clutter, forms or navigation that could interfere with the plugin.
- Name the page anything you'd like. Common choices include:
ShopShop FiltersBuy FiltersOrder Air Filters
This page will serve as the storefront where customers interact with the eContractor plugin.
Add the Plugin to the Page
Once the page is created:
- Click to Edit the Page.
- Add a Custom HTML Block.
- Paste the following code:
html
<ff-plugin></ff-plugin>TIP
💡 You can add padding or additional styles around the custom element using inline CSS or WordPress block settings, depending on your theme.
Final Step: Deploy Your Changes
Once everything is in place, you will see an alert titled Your Almost There!
What does the alert look like?
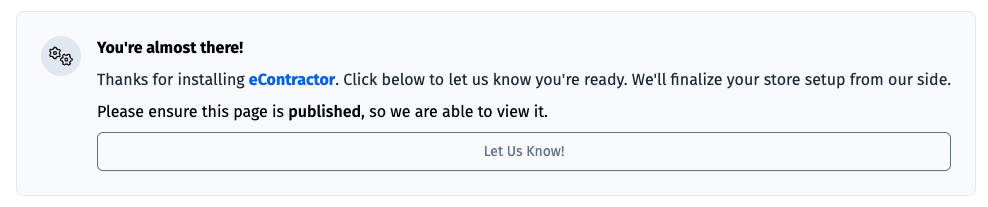
Make sure to publish or update the page so that its live and publicly accessible.
WARNING
⚠️ Please ensure the page is Live before selecting the Let Us Know button, as our team will need to be able to access the page.
Once deployed, go ahead and click on the Let Us Know button. Our team will then get your store live as soon as possible!
TIP
🚀 Once installed and deployed, you’re ready to start driving traffic to your shop page and begin selling!
Troubleshooting
A very common issue with this installation process is the interference with various popular WordPress caching plugins such as:
These tools can override the script tag, defer JavaScript execution or serve cached HTML versions of your page, which will prevent the plugin from initializing proplery.
Symptoms you might see include:
- The plugin does not appear until the page is interacted with (tap or scroll).
- The plugin displays an error message, and products do not load.
- The page looks empty or borken when opened via a QR Code or exteral link(such as from a confirmation email).
- Styles or interactivity feel 'delayed' or missing.
Recommended Fix
We strongly recommend excluding your eContractor "Shop" page from all caching and optimization rules coming from your caching plugin.
Please refer to the respective documentation for each plugin to find information on how to do-so.
Still Need Help?
Some WordPress themes - especially highly customized or older versions - can behave unpredictably when adding custom HTML or scripts.
If your unsure about any of the steps above, please feel free to contact our support team.
We are happy to assist with the integration or answer any questions not covered in the documentation.